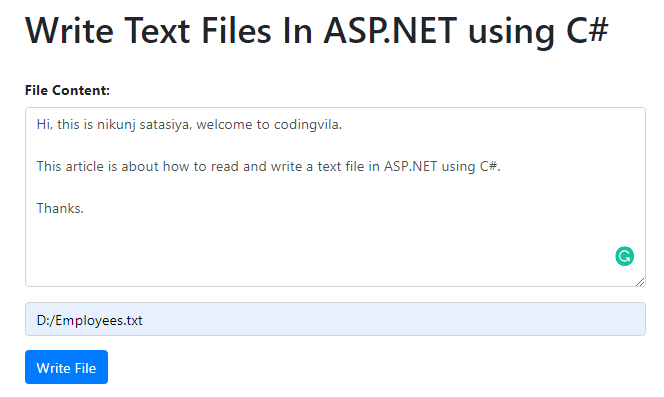
Example scope: this guide reads and writes text files with C# in classic ASP.NET Web Forms on .NET Framework. The examples use ASPX pages and server controls. The file and stream concepts also apply elsewhere, but the page code is not an ASP.NET Core example.
Requirement:
What is a File?
What is the StreamReader class?
What is the StreamWriter class?
Demonstration
HTML
<%@ Page Language="C#" AutoEventWireup="true" CodeFile="ReadFile.aspx.cs" Inherits="_Default" %>

<!DOCTYPE html>

<html xmlns="http://www.w3.org/1999/xhtml">
<head runat="server">
    <title>Read Text File in C#</title>
    <meta charset="utf-8" />
    <meta name="viewport" content="width=device-width, initial-scale=1" />
    <link rel="stylesheet" href="https://maxcdn.bootstrapcdn.com/bootstrap/4.3.1/css/bootstrap.min.css" />
    <script src="https://ajax.googleapis.com/ajax/libs/jquery/3.4.0/jquery.min.js"></script>
    <script src="https://cdnjs.cloudflare.com/ajax/libs/popper.js/1.14.7/umd/popper.min.js"></script>
    <script src="https://maxcdn.bootstrapcdn.com/bootstrap/4.3.1/js/bootstrap.min.js"></script>

</head>
<body>
    <form id="form1" runat="server">
        <div>
            <div class="container mt-3 ">
                <h1>Read Text Files In ASP.NET using C# </h1>
                <br />
                <asp:TextBox ID="txtFilepath" class="form-control" runat="server"></asp:TextBox>
                <div>
                </div>
                <br />
                <div class="form-group">
                    <label for="comment"><b>File Content:</b></label>
                    <textarea id="txtText" runat="server" class="form-control" style="background-color: white;" rows="8" readonly="true"></textarea>
                </div>
                <div class="mt-3">
                    <asp:Button ID="btnRead" runat="server" class="btn btn-primary" Text="Read File" OnClick="btnRead_Click" />
                </div>
            </div>
        </div>
    </form>
</body>
</html>
Read a Text file in C#
ReadFile.aspx.cs
The six read methods below are alternatives, not statements to paste together. This is ASP.NET Web Forms on .NET Framework, not ASP.NET Core. Add the following complete code-behind as ReadFile.aspx.cs; its class name matches the page directive. Enter a filename such as notes.txt. Both pages use the application-owned App_Data/TextFiles folder. Save a file with WriteFile.aspx before reading it. Use one read alternative inside the try block of the handler, replacing the default File.ReadAllText statement, where filepath is already defined. Keep the imports shown below.
Methods 1 and 2 preserve the original text and line separators. The line-based methods rebuild the text, so line endings or a final newline can differ. Although reading lines can avoid loading an array, this demo still accumulates all output in a text control; it is not a memory-bounded large-file viewer. The screenshots show the original demonstration; the revised example accepts a filename within App_Data/TextFiles.
using System;
using System.IO;
using System.Text;
using System.Collections.Generic;

public partial class _Default : System.Web.UI.Page
{
    protected void btnRead_Click(object sender, EventArgs e)
    {
        try
        {
            string fileName = txtFilepath.Text.Trim();
            if (string.IsNullOrEmpty(fileName) || Path.IsPathRooted(fileName) ||
                fileName.IndexOfAny(Path.GetInvalidFileNameChars()) >= 0 ||
                Path.GetFileName(fileName) != fileName ||
                !string.Equals(Path.GetExtension(fileName), ".txt", StringComparison.OrdinalIgnoreCase))
            {
                txtText.InnerText = "Enter a plain .txt filename, for example notes.txt.";
                return;
            }
            string filepath = Path.Combine(Server.MapPath("~/App_Data/TextFiles"), fileName);
            txtText.InnerText = string.Empty;
            // Method 1 is the default. Use one alternative below at a time.
            txtText.InnerText = File.ReadAllText(filepath, Encoding.UTF8);
        }
        catch (IOException)
        {
            txtText.InnerText = "The file could not be read. Save it first and check server access.";
        }
        catch (UnauthorizedAccessException)
        {
            txtText.InnerText = "The application cannot read this text file.";
        }
        catch (ArgumentException)
        {
            txtText.InnerText = "Enter a valid .txt filename.";
        }
    }
}
C#
//Method 1: Read Text File into String using File.ReadAllText

txtText.InnerText = File.ReadAllText(filepath, Encoding.UTF8);
// Method 2: read all text through StreamReader.
using (var streamReader = new StreamReader(filepath, Encoding.UTF8))
{
    txtText.InnerText = streamReader.ReadToEnd();
}
// Method 3: read text into a string array.
string[] Mylines = File.ReadAllLines(filepath, Encoding.UTF8);
txtText.InnerText = string.Join(Environment.NewLine, Mylines);
// Method 4: collect lines, then convert to a string array.
var strlist = new List<string>();
using (var streamReader = new StreamReader(filepath, Encoding.UTF8))
{
    string strline;
    while ((strline = streamReader.ReadLine()) != null)
    {
        strlist.Add(strline);
    }
}
string[] Mylines = strlist.ToArray();
txtText.InnerText = string.Join(Environment.NewLine, Mylines);
//Method 5: Read Text File Line by Line

foreach (string strline in File.ReadLines(filepath, Encoding.UTF8))
{
    txtText.InnerText += strline + "\n";
}
// Method 6: process each line through StreamReader.
using (var Reader = new StreamReader(filepath, Encoding.UTF8))
{
    string strline;
    while ((strline = Reader.ReadLine()) != null)
    {
        txtText.InnerText += strline + Environment.NewLine;
    }
}
Write a Text file in C#
HTML
<%@ Page Language="C#" AutoEventWireup="true" CodeFile="WriteFile.aspx.cs" Inherits="WriteFile" %>

<!DOCTYPE html>

<html xmlns="http://www.w3.org/1999/xhtml">
<head runat="server">
    <title>Write Text File in C#</title>
    <meta charset="utf-8" />
    <meta name="viewport" content="width=device-width, initial-scale=1" />
    <link rel="stylesheet" href="https://maxcdn.bootstrapcdn.com/bootstrap/4.3.1/css/bootstrap.min.css" />
    <script src="https://ajax.googleapis.com/ajax/libs/jquery/3.4.0/jquery.min.js"></script>
    <script src="https://cdnjs.cloudflare.com/ajax/libs/popper.js/1.14.7/umd/popper.min.js"></script>
    <script src="https://maxcdn.bootstrapcdn.com/bootstrap/4.3.1/js/bootstrap.min.js"></script>

</head>
<body>
    <form id="form1" runat="server">
        <div>
            <div class="container mt-3 ">
                <h1>Write Text Files In ASP.NET using C# </h1>
                <br />
                <div class="form-group">
                    <label for="comment"><b>File Content:</b></label>
                    <textarea id="txtText" runat="server" class="form-control" style="background-color: white;" rows="8"></textarea>
                </div>
                <div>
                    <asp:TextBox ID="txtFilepath" class="form-control" runat="server" placeholder="Text filename, for example notes.txt"></asp:TextBox>
                </div>
                <div class="mt-3">
                    <asp:Button ID="btnWrite" runat="server" class="btn btn-primary" Text="Write File" OnClick="btnWrite_Click" />
                </div>
                <asp:Label ID="lblMessege" runat="server"></asp:Label>
            </div>
        </div>
    </form>
</body>
</html>
C#
For WriteFile.aspx.cs, use the complete class below. Create the directory separately from the filename; passing a full filename to Directory.CreateDirectory creates a directory at that name. This demo overwrites an existing text file. Restrict the page to authorized users and grant the application identity only the required access to App_Data/TextFiles. See Directory.CreateDirectory.
using System;
using System.IO;
using System.Text;

public partial class WriteFile : System.Web.UI.Page
{
    protected void btnWrite_Click(object sender, EventArgs e)
    {
        try
        {
            string fileName = txtFilepath.Text.Trim();
            if (string.IsNullOrEmpty(fileName) ||
                Path.IsPathRooted(fileName) ||
                Path.GetFileName(fileName) != fileName ||
                fileName.IndexOfAny(Path.GetInvalidFileNameChars()) >= 0 ||
                !string.Equals(Path.GetExtension(fileName), ".txt", StringComparison.OrdinalIgnoreCase))
            {
                lblMessege.Text = "Enter a plain .txt filename, for example notes.txt.";
                return;
            }

            string directory = Server.MapPath("~/App_Data/TextFiles");
            Directory.CreateDirectory(directory);
            string filePath = Path.Combine(directory, fileName);
            using (StreamWriter writer = new StreamWriter(filePath, false, new UTF8Encoding(false)))
            {
                writer.WriteLine(txtText.InnerText);
            }
            lblMessege.Text = "Text file saved.";
        }
        catch (IOException)
        {
            lblMessege.Text = "The file could not be written. Check the filename and server access.";
        }
        catch (UnauthorizedAccessException)
        {
            lblMessege.Text = "The application cannot write to its text-file folder.";
        }
        catch (ArgumentException)
        {
            lblMessege.Text = "Enter a valid .txt filename.";
        }
    }
}
Explanation
Output